See this project hosted on Netlify at headless-wordpress-11ty.netlify.app, or skip the tutorial altogether and view the Git repo at github.com/thedavedavies/Headless-WordPress-11ty.
What is Eleventy?
11ty is a Static Site Generator, which we can use to fetch our WordPress posts and pages, and then compile this data at build time. This allows us to use WordPress as a Headless CMS, and deploy an entirely static and lightweight site to Netlify. We can get this data using either the WordPress REST API, or using a WPGraphQL endpoint. In this tutorial, we’ll be using the WordPress REST API.
Why use 11ty with Headless WordPress?
These days there are many great headless Content Management Systems (CMS) and Static Site Generators (SSG) to choose from, so why pick WordPress over any other? I’ve been working with WordPress for over 10 years, and had a load of established sites I wanted to be able to use the data on. These sites didn’t need any extra functionality, and so a site of entirely static HTML pages are the perfect solution. WordPress also has an active and supportive community, with thousands of plugins to help you build any type of website. For sites which need extra functionality, you can use NextJS with Headless WordPress too.
Using the WordPress fetch API
If you’ve never used Eleventy before, then there’s loads of great resources at https://www.11ty.dev. In the meantime, create a fresh project (we’ll call ours Headless-WordPress-11ty) and open that new project in your code editor (I’m using VS Code).
Installing Eleventy into our project requires a package.json file. Let’s create it with npm init -y. The -y parameter tells npm to skip all the questions and just use the defaults.
npm init -y
npm install --save-dev @11ty/eleventy node-fetch
In that code snippet above, the dependencies we’re installing are:
- Eleventy – The Static Site Generator
- node-fetch – We’ll use this to fetch our data from the WordPress REST API.
Preparing our 11ty project to fetch data from the WordPress REST API
After installing the Eleventy and node-fetch packages, create a new directory in the root of your project called _data, and inside that new _data folder create a file called posts.js. The _data directory is where all of our global data will be controlled. In our case, that means using the WordPress REST API to hit our endpoint and fetch our posts and pages.
Back in your root directory, create another new directory named _layouts, and inside _layouts create a new file called layout.njk.
Finally, back in your root directory again, create 2 new files called index.njk and posts.njk.
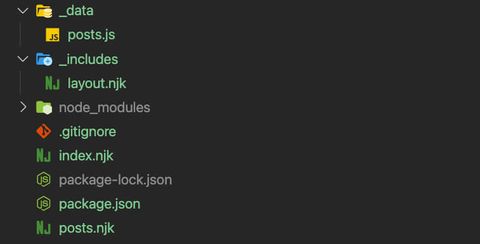
Having added these new directories and files, your project should be looking similar this screenshot:
Step 1: Fetching post data from the WordPress REST API
Now that we’ve prepared the foundations and set up our base project, let’s get writing some code to fetch our posts from WordPress.
Head to your _data/posts.js file, and add the following code:
const fetch = require("node-fetch");

module.exports = async function () {
  console.log("Fetching data...");

  return fetch("https://fake-data.better-wordpress.dev/wp-json/wp/v2/posts")
    .then((res) => res.json())
    .then((json) => json);
};
What does this code do?
Exclusively a browser API, we can’t use fetch in NodeJS. Using the node-fetch package brings the ability to use fetch into NodeJS. We’re then setting up an asynchronous function, which expects a promise to be returned, which is exactly what’s happening when we run return fetch("https://fake-data.better-wordpress.dev/wp-json/wp/v2/posts").
Step 1.5: Testing your fetch
Next, open your package.json file and in your scripts property add the following 2 scripts:
"scripts": {
    "start": "npx @11ty/eleventy --serve",
    "build": "npx @11ty/eleventy"
  },
What does this code do?
The scripts property of your package.json file allows you to run predefined scripts. Once you’ve added the start and build scripts above, you’ll be able to run npm run start to start up a hot-reloading local web server, and npm run build to compile any templates into the output folder (this defaults to _site).
What do we get back from our fetch?
The async function we wrote earlier in _data/posts.js returns to us a JSON object which we can then work with. To confirm that the data is coming back successfully from WordPress, you can change the final .then in your function to a console.log():
return fetch("https://fake-data.better-wordpress.dev/wp-json/wp/v2/posts")
.then((res) => res.json())
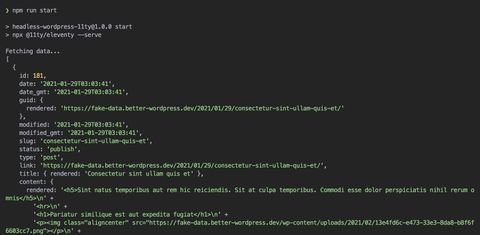
.then((json) => console.log(json);and run your npm run start script in your console. If all goes well with your fetch, then you should see an output similar to the screenshot below, with your JSON data logged out into the console:
Step 2: Creating a layout template
Now that we’re successfully fetching our posts from the WordPress REST API, we can start creating a template to show that data.
In your _includes/layout.njk file, paste in the following code:
<!DOCTYPE html>
<html lang="en">
  <head>
    <meta charset="UTF-8"/>
    <meta http-equiv="X-UA-Compatible" content="IE=edge"/>
    <meta name="viewport" content="width=device-width, initial-scale=1.0"/>
    <title>{{ posts.title.rendered }}</title>
  </head>
  <body>
    {{ content | safe }}
  </body>
</html>
What does this code do?
Very simply, the code above scaffolds out the HTML we’ll use to display our data.
{{ posts.title.rendered }}is the title object that we get back in our JSON object- Using
{{ content | safe }}means that the layout template will populate thecontentdata with the child template’s content. Using thesafefilter prevents double-escaping the output (this is built into Nunjucks).
Step 3: Creating our index page
Now we get to start seeing content in our browser! In your index.njk file, paste the following code:
---
pagination:
  data: posts
  size: 2
layout: layout.njk
title: Latest Posts
---

<ol>
  {%- for item in pagination.items %}
    <li>
      <a href="/posts/{{ item.title.rendered | slug }}">
        {{ item.title.rendered }}</li>
    </a>
  {% endfor -%}
</ol>

<nav>
  <ol>
    <li>
      {% if pagination.href.previous %}
        <a href="{{ pagination.href.previous }}">Previous</a>
      {% else %}Previous{% endif %}
    </li>
    {%- for pageEntry in pagination.pages %}
      <li>
        <a href="{{ pagination.hrefs[ loop.index0 ] }}" {% if page.url == pagination.hrefs[ loop.index0 ] %} aria-current="page" {% endif %}>Page
          {{ loop.index }}</a>
      </li>
    {%- endfor %}
    <li>
      {% if pagination.href.next %}
        <a href="{{ pagination.href.next }}">Next</a>
      {% else %}Next{% endif %}
    </li>
  </ol>
</nav>
What does this code do?
Nunjucks uses front matter, which will be processed by our templates when we build our site. So what does this front matter do?
- pagination iterates over our data set and then creates pages for individual chunks of data.
- data: posts is taking our _data/posts.js as a data set. The front matter value for data needs to match up with our data file. So, if the file was called _data/pages.js, then our front matter would instead be: data: pages.
- size: 2 is telling 11ty to list 2 of our posts before moving onto pagination
- layout: layout.njk is telling 11ty to use the layout we build in Step 2.
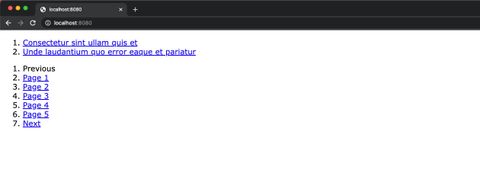
With the saved, and npm run start running, you should now be able to see a paginated list of our pre-build posts from WordPress!
Step 4: Creating a template for our single posts
The final task we have to do before launching our site is to create a template for our single posts. Paste the following code into posts.njk:
---
pagination:
    data: posts
    size: 1
    alias: posts
permalink: "posts/{{ posts.title.rendered | slug }}/"
layout: layout.njk
---

<h1>{{ posts.title.rendered }}</h1>
<div class="mainContent">
    {{posts.content.rendered | safe}}
</div>
What does this code do?
The front matter in our posts.njk file is similar to our index.njk, however this time our pagination size is just 1, and we’re using an alias in the slug.
11ty provides a number of filters which we can pass into our content. Here, we’re using the slug filter to ‘slugify’ our URL, and the safe filter again to render out the HTML we get back from the WordPress REST API.
Finally we have a fully built (but very much unstyled) site which is populated from our existing WordPress website! Our last task is to deploy this site to Netlify.
Step 5: Hosting our 11ty site with Netlify
Netlify is a powerful serverless hosting platform with an intuitive git-based workflow and a very generous free tier. This means we can deploy our static 11ty site to Netlify, and if you’re using Git you can connect Netlify to your Git repo to trigger a rebuild every time you commit.
At this point, it’s best practice to remove your API endpoint URLs from your code and use a .env file instead. So let’s do that by installing the dotenv package: npm i dotenv. Next, create a .env file in the root of your project. This is where we’ll add all of our secret endpoint URLs. If you created a .gitignore file earlier, make sure to have .env* in the file. This will tell git to ignore all .env files.
Open up your .env file, paste in your WordPress REST API endpoint along with a variable to link it to – i.e.: WORDPRESS_REST_API_URL=https://fake-data.better-wordpress.dev/wp-json/wp/v2/posts
Next, we need to make sure that 11ty knows about our .env file, so create a .eleventy.js file (note the dot at the start of that filename), and paste the following code:
module.exports = function () {
  require("dotenv").config();
};
The .eleventy.js file holds all our custom site-wide configuration, but for now all we need to pass to it is our dotenv config. You can read more about Eleventy configuration.
Finally in our _data/posts.js file, we can replace our endpoint url with process.env.WORDPRESS_REST_API_URL. We can now safely commit our code to our Git repo without exposing our secret endpoint URLs, or any other API keys you need to keep secret.
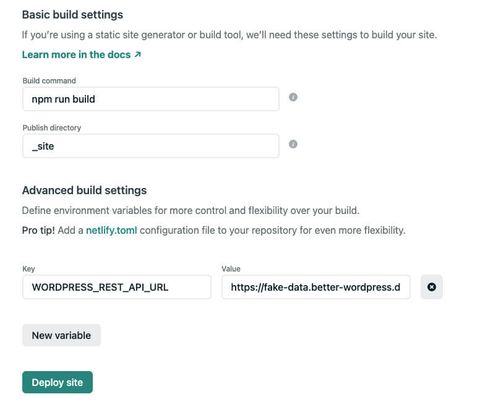
Netlify already has a super in-depth blog post on deploying your site, so follow that to get your site up on Netlify. One addition we want to make though, is just before you Deploy your site – click Advanced build settings and add in your env key and value from your local .env file (which hopefully hasn’t been committed to your repo).
Finished!
And we’re done! We now have a very high level proof-of-concept project to fetch our posts from WordPress, and build them into a static site using Eleventy, then deploy that site to Netlify.
There’s plenty more we can do, including styling the site and fetching various pages and other data that the WordPress REST API gives us.